
By Jared Pebworth and Lydia Rees

Since 2018 the Survey has been using a scanner and 3D printer to produce replicas of objects in our collections. Scanned objects can be used for research purposes because the process involves very accurate measurements and produces digital 3D images which allow the viewer to turn the image and to view all sides of a scanned object. In addition to images, 3D scans can be used in conjunction with 3D printers to create physical replicas of the original artifact. The replicas created by this printer are great for use in teaching and for exhibits because they allow people to hold, touch, and look up-close at details of artifacts when the original object is too rare or fragile to be handled or even taken outside the collection facility.
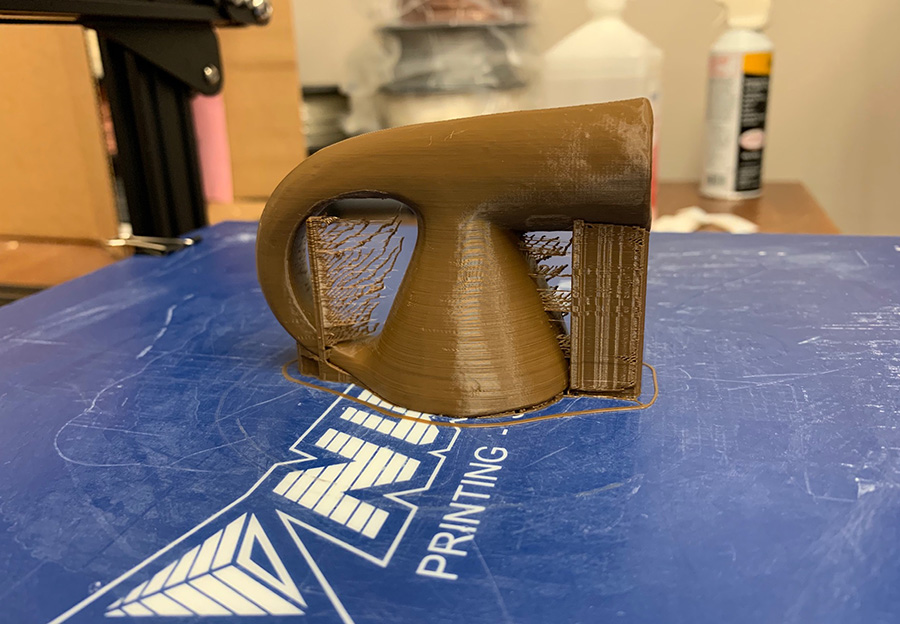
The 3D printer the Survey acquired in 2018 with the help of an Arkansas Natural and Cultural Resources Council grant is a filament style printer which uses plant-based plastic to print objects one layer at a time. It produces 3D models with a solid shell and a mostly hollow matrix inside. The hollow interior allows the printer to produce objects using less filament, and in less time, than if the object were solid. These replicas also come off the printer with an attached scaffolding that holds the object upright as it prints.
The filament printer produces amazing results, but objects do not come right off the printer looking identical to the original. Because of the material used and the specifics of the printing process, producing a close approximation of the aesthetic, finish, and overall feeling of the original object requires skill and an artistic touch. Our expert in applying the finishing touches to artifact replicas is Jared Pebworth. Jared has experience creating replicas of artifacts using manual skills like flint knapping and woodworking to produce things like hafted stone tools, so this was a logical extension of his expertise. The details of the finishing process continue to evolve as Jared applies his existing skills and refines his methods for finishing printed objects.
Jared outlined his steps for taking the replica from fresh-off-the-printer to finished object. Removing the attached scaffolding is where the art of finishing the object begins. The first step is to remove the scaffolding. This is done with a knife, hacksaw, or electric band saw depending on the replica. Then a file is used to shave down those areas until they are flush with the surface of the object.
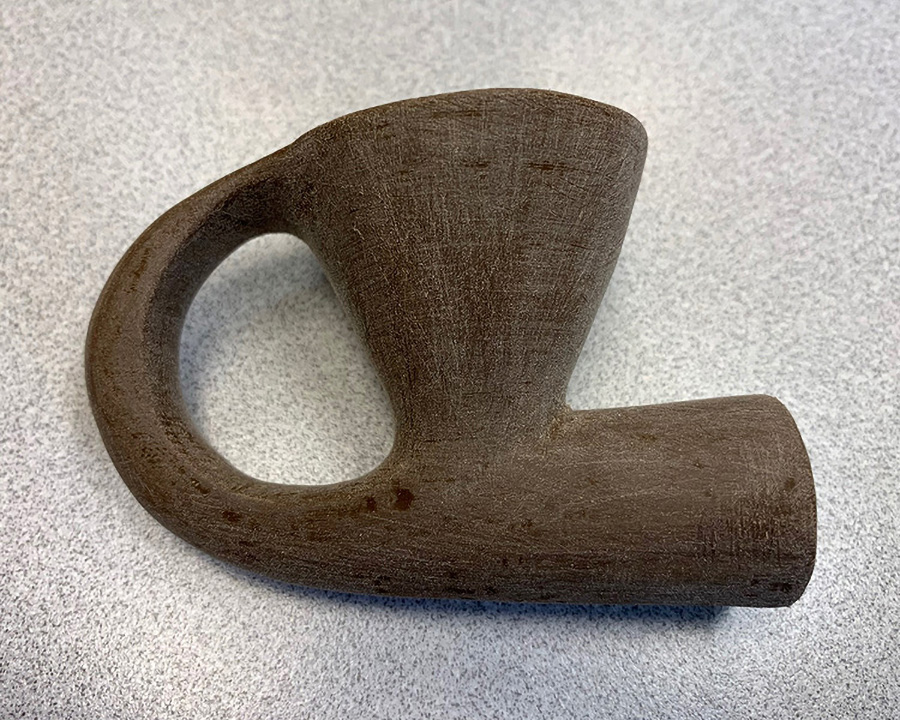
Sanding, the most time-consuming step in the finishing process, completes the removal of the scaffolding columns. The entire surface gets a once-over with medium grit sandpaper to remove the horizontal striations left visible as the object is printed in layers. The visibility of these lines varies depending on the quality of both the scan and printing. If the lines are still visible after the initial sanding, mechanical sanding may be used but care must be taken not to expose the hollow framework beneath the solid surface layer. The sanding stage is completed with the use of a fine grit paper.
Once Jared is happy with the general outline of the object and its surface is smooth, the object is painted. First, it must be cleaned to remove any sanding residue. Then, in the case of a replica of a ceramic object, it is sprayed with a matte finish spray paint in an initial base color designed to look like the original. Unglazed pottery is rarely one even color due to fire clouds from open pit firing, visible temper, and variations in the clay. To replicate these varied colors, Jared uses an additional color applied in zones. The second color is manipulated with sponges, brushes, and cloths to achieve a realistic result. A burnished finish was applied to many pots in the ARAS archeological collections. This was achieved by the original maker by rubbing the clay pot with a smooth stone until a glossy finish developed. In the replica process this effect is achieved by rubbing the painted surface with a clean cloth, applying moderate pressure while the paint is still tacky.
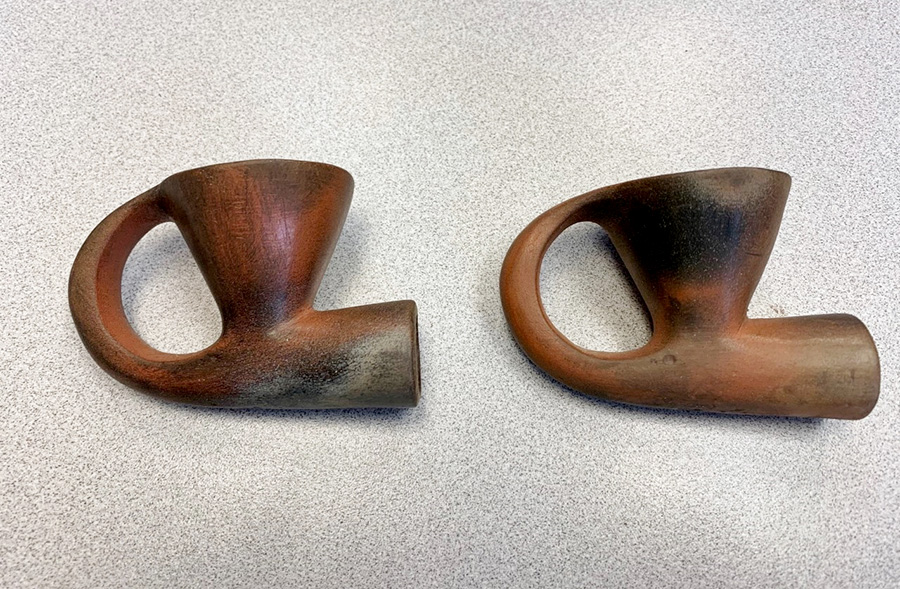
For some projects, a texturing process is desired. This can help remove the freshly painted look and add an aged appearance. There are two variations that can be used to produce a textured finish, wet or dry. A variety of dry clays and soils can be applied to the surface to create a realistic appearance. The wet process involves applying a paste or mud to the object that is left to dry. After it dries it can be left as is or polished to produce the desired look.
At this point in the process, the fusion of art and technology has resulted in a finished replica that looks like the original, but which can be taken on visits to school groups or exhibited safely in a variety of locations. The creation of replicas like the ones pictured here makes it easier for the Survey to fulfill its mission of public outreach while also safely curating the state’s archeological collections for future generations.
")
")
. Although this artifact is damaged, it is beautifully engraved.")
")
")
